A new repair for cracked socketsThere are a number of techniques that have been used in the past to reinforce socket cracks, including pinning, stitching, butterfly joints, flush-banding etc. I'm not really in favour of any of these. They all depend on making changes to the outside of the affected region, something I would rather not do. Some repairs I have seen of this type have been downright unsightly, often obliterating important information such as the maker's mark. So, how to reinforce such a crack, without resorting to these methods? Let's look at the problem and the new solution. |
|
 |
The problem on this particular late 19th century flute started with the usual crack in the barrel, caused by shrinkage of the wood resisted by the presence of the tuning slide. I'd repaired it some time ago by my usual preferred method of removing the slide, glueing the crack closed, reboring the shrunken wood and reinstalling the slide. It went fine for a year or more, but finally the crack opened up again, just in the area around the socket. |
| This is not surprising. The wood is at
its thinnest here, it's under stress from the tenon lapping, it gets
expanded and contracted every time the flute is put together, and it's
under stress from the force we put on the body to press it to our lips.
The owner also revealed that when it first cracked, she rubbed cork grease into the crack to seal it. The flute had also been oiled after it cracked. You can try to get rid of these oils and greases before gluing, but you can't guarantee their complete removal, and that must influence how well the glue will take. Rather than work from the outside of the instrument, where the results would be visible, I decided to work from the inside. |
|
|
|
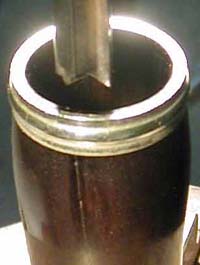
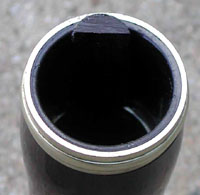
I set the barrel, socket upwards, on the mill, and, using a 10mm diameter end-cutting router bit, bored out the back of the crack. The aim is to remove as much of the cracked wood as possible from the inside of the socket, and replace it with virginal wood. The limits are the start of the slide and the back of the socket ring. So now I have a barrel with a hemi-cylindrical groove out of its wall, about 2mm deep and 6mm wide. |
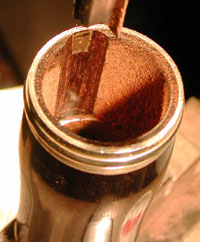
 Now,
because we know it was a 10mm cutter, it's a pushover to turn up a 10mm
piece of fresh wood, with a perfectly square end. Run that
lengthways through the bandsaw gives two semicylinders (one for next
time!). The semicylinder glues perfectly into the groove in the
socket wall. Now,
because we know it was a 10mm cutter, it's a pushover to turn up a 10mm
piece of fresh wood, with a perfectly square end. Run that
lengthways through the bandsaw gives two semicylinders (one for next
time!). The semicylinder glues perfectly into the groove in the
socket wall. |
|
 |
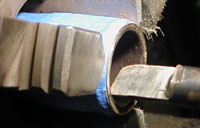
Once the glue dries, skimming the socket in the lathe removes the excess wood and glue. The crack is largely replaced and the little bit remaining well reinforced by new wood with a wide and fresh gluing surface. |

So here's the end result - a repair that is quite invisible except perhaps under very strong light. No stresses to cause problems down the track. And since the grain directions are unlikely to line up exactly (and certainly didn't in this example!), the reinforcement should prove very strong indeed. |
|
